Creating a new Spigot plugin project in Kotlin is super straightforward and in this guide I’ll show you the easiest way to do it. I’m assuming you have IntelliJ IDEA installed and will be using it. Besides the IDE, you’ll need:
For context, Spigot is a high-performance fork of the Minecraft server software that allows you to run custom plugins. Think of it as the modded version of Minecraft servers that lets you add custom functionality, commands, and features. Kotlin is a modern programming language that runs on the Java Virtual Machine (JVM) and is fully interoperable with Java, making it perfect for Minecraft plugin development since it’s more concise and expressive than Java.
Maven is a build automation tool that manages your project dependencies and handles compilation. It’s like a package manager that automatically downloads libraries your project needs and handles the build process.
Creating a new project
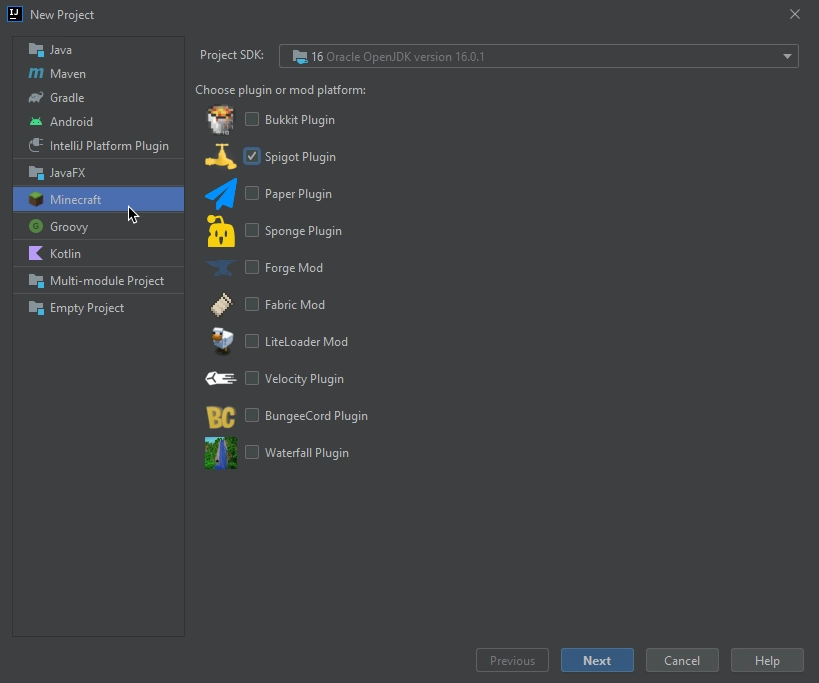
With everything installed, create a new project in the IDE. The extension we installed will add a Minecraft option to the menu. Select it and choose the Spigot Plugin option.
As for the JDK (Java Development Kit), this choice will depend on which Java version is required to run Spigot for the version you want to target. For example, Java 8 is still the most widely used version among servers today, but recent Minecraft updates like 1.18 already require Java 17.
The JDK is basically the toolkit that contains everything you need to develop Java applications. Since Minecraft runs on Java and Kotlin compiles to Java bytecode, you need the appropriate JDK version installed.
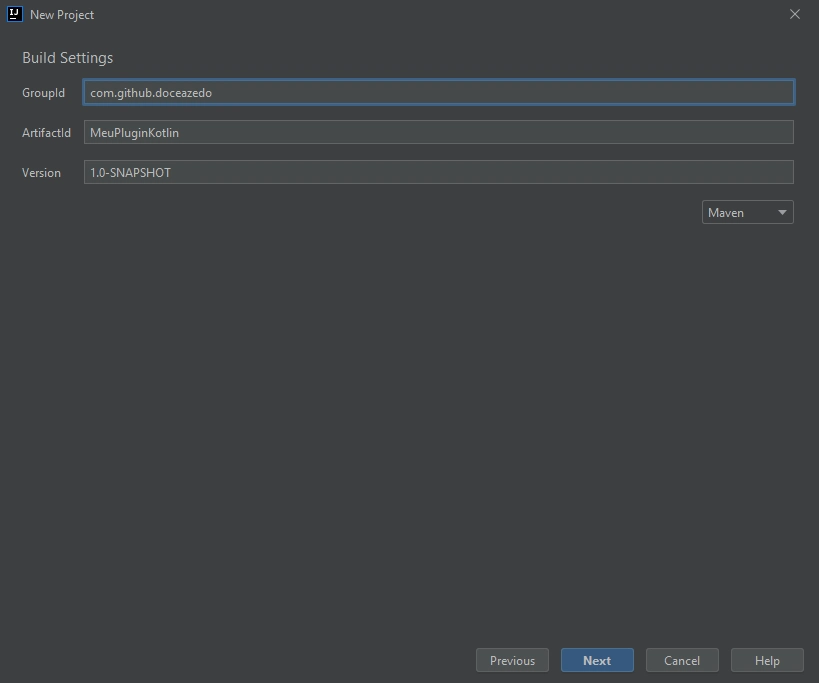
With that, proceed to the next step. In GroupId, you should put your website domain in reverse, in my case it could be com.doceazedo. If you don’t have one, you can use your GitHub username in the format com.github.doceazedo.
The GroupId follows the reverse domain name convention used in Java packages. It’s a way to ensure your plugin has a unique identifier that won’t conflict with other plugins. Think of it like namespacing in other programming languages.
ArtifactId is the name that will be shown when generating the JAR file build. This will also be used by default as your plugin name.
In Version, you can leave the default or change it however you want. This value can be easily changed later in the pom.xml file.
Below, leave Maven selected.
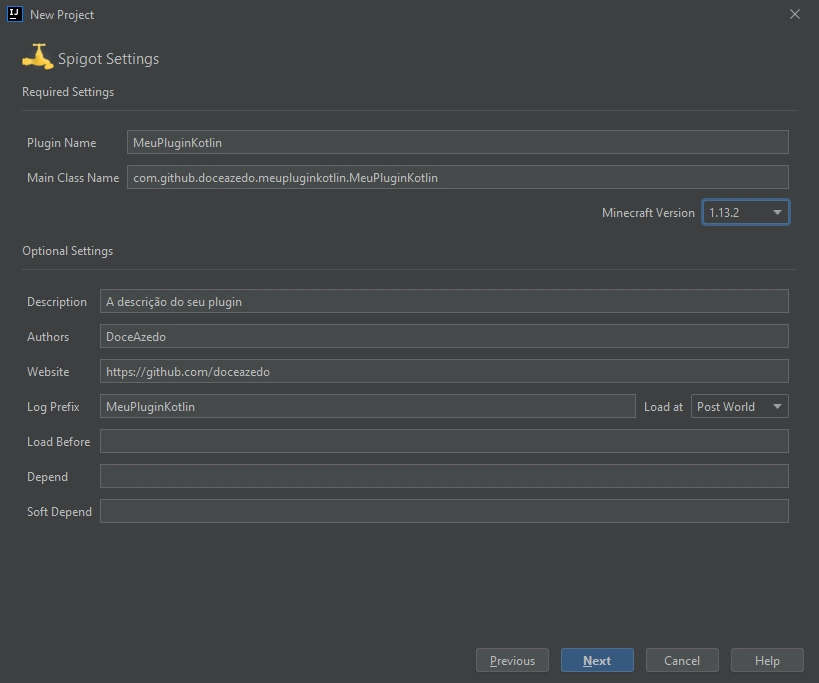
In the Spigot settings, the Plugin Name and Main Class Name fields should already be filled as you wish, but I prefer to change the main class, in the second field, to Main.
💡 In retrospect, I recommend using the same for both the plugin and main class names. This will make your life easier when you are working with multiple plugins.
Choose the Minecraft version you want to target. I like to select 1.13.2 which works from that version up to the most recent ones, but you can select whichever you prefer.
The version you choose determines which Spigot API features you’ll have access to. Newer versions have more features but won’t work on older servers. 1.13.2 is a sweet spot because it introduced many modern API features while still being compatible with a wide range of servers.
The fields below are optional. In Load Prefix you can repeat the plugin name, it will be used when printing messages to the console. Load Before, Depend, and Soft Depend can be left empty, as they refer to the list of plugins that are necessary for ours to work, and at this moment there aren’t any. The other fields are self-explanatory.
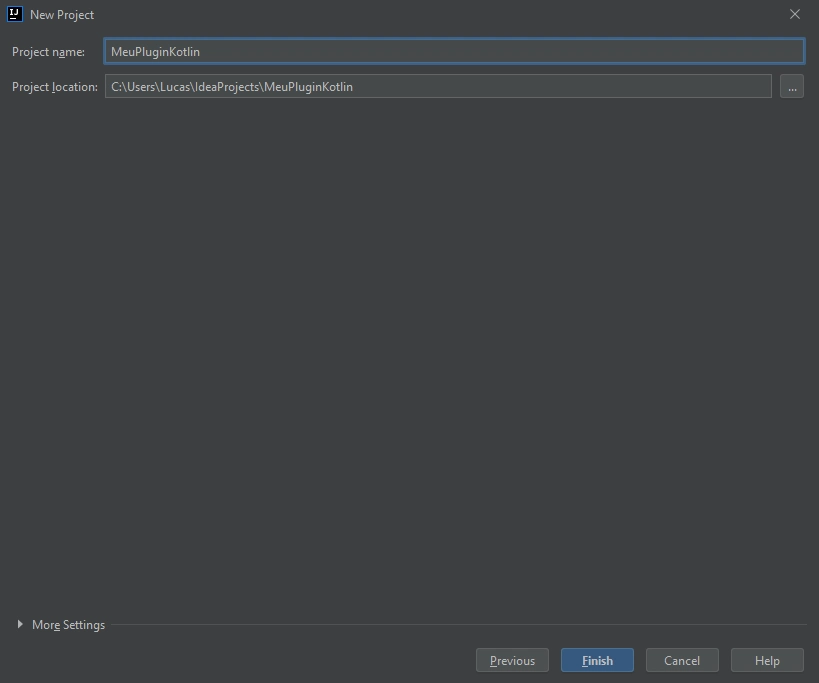
Finally, define the project name and where it will be saved on your machine. You can repeat the plugin name here again.
Configuring Kotlin
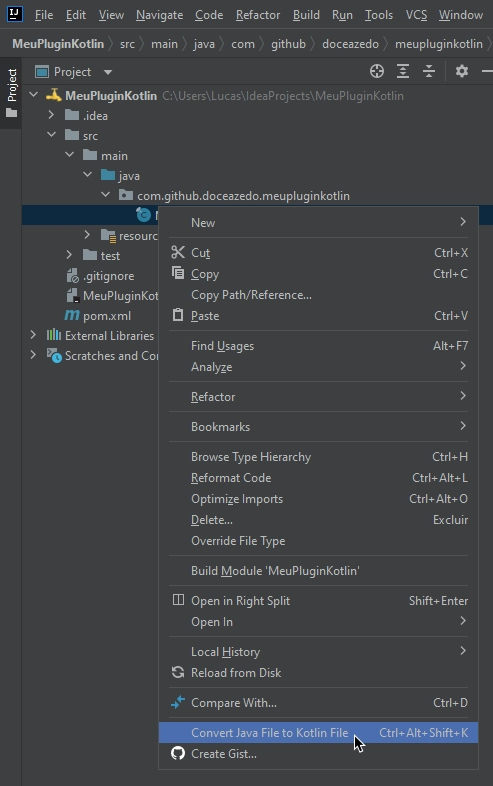
Now you already have the skeleton of a Spigot plugin in Java. To use Kotlin, the first step is to open the project until you reach the main class, right-click and then select Convert Java File to Kotlin File. Click OK to configure Kotlin in the project and OK again.
The pom.xml file will open. In it we need to change the Java version from “1.8” to the one we chose earlier (in my case, 16). You can use CTRL + H (or CTRL + R, at least on my machine) to find all occurrences of “1.8” and replace with the correct version. Or if you prefer to do the replacement manually, look for the <java.version> and <jvmTarget> tags.
The pom.xml file is Maven’s configuration file. It’s like a recipe that tells Maven what dependencies to download, what Java version to use, and how to build your project. When we change the Java version here, we’re telling Maven to compile our code for that specific Java version.
Now at the end of the file, look for the kotlin-stdlib-jdk8 dependency and simply replace it with kotlin-stdlib.
The Kotlin standard library (stdlib) contains all the core Kotlin functions and classes. The jdk8 version was specific to Java 8, but the regular stdlib works across different Java versions, making it more flexible.
Then click the ![]() icon to update the changes we made. Wait a few seconds and notice that the pom.xml will no longer have any errors.
icon to update the changes we made. Wait a few seconds and notice that the pom.xml will no longer have any errors.
Now right-click again on the main class, and then select Convert Java File to Kotlin File. Then click Yes and you’re done, we can now write Spigot plugins in Kotlin! 🥳
One last thing we need to do now is open the plugin.yml file in the resources folder. At the end of this file, we’ll add the Kotlin library, so when Spigot runs our plugin, it will know it should install Kotlin as a dependency.
The plugin.yml file is Spigot’s configuration file that tells the server about your plugin. It includes metadata like the plugin name, version, main class, and dependencies. By adding Kotlin to the libraries section, we’re telling Spigot to automatically download and load Kotlin when our plugin starts.
Notice that at the end of the line is the Kotlin version. You can find out which version you’re using at the beginning of the pom.xml file, in the <kotlin.version> tag.
libraries:
  - org.jetbrains.kotlin:kotlin-stdlib:1.6.10
💡 This is no longer needed for Spigot 1.13 and up.
Now you can enjoy all the wonders of Kotlin to develop your Spigot plugin! ☕🎉
Generating the .JAR file
Quoting the Spigot documentation, a limitation of Kotlin is not being able to compile the .JAR file directly in the IDE. But with Maven installed, just open the terminal in the project folder and run:
mvn installA JAR (Java Archive) file is basically a compressed file that contains all your compiled code and resources. It’s like a zip file but specifically designed for Java applications. Minecraft servers load plugins from JAR files.
When finished, the file will be available in the “target” folder. You might find other JARs with prefixes like “original-” and “shaded-” that can be ignored. Always use the file with just your plugin name and version, without any prefix.
Developing the plugin
There’s no secret here. Although the focus of this post is explaining how to create a Spigot plugin project with Kotlin, I’ll develop a feature for demonstration. Something really simple: a /helloworld command that will return our nickname and a random number in chat.
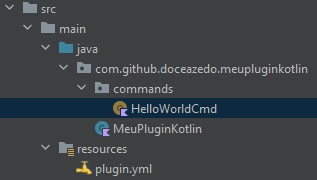
For this, I’ll create a package called commands and an object called HelloWorldCmd. This is a structure I like and it looks something like this:
In Kotlin, an object is a singleton class, meaning there’s only ever one instance of it. This is perfect for command handlers since we don’t need multiple instances of the same command logic.
Our object should extend CommandExecutor and contain a function that overrides onCommand (just by typing “override” inside the object, the IDE should already fill in the rest for you). In this function, I’ll return false if whoever sent the command isn’t a player. I’ll get the player’s nickname and use Kotlin’s Random.nextInt() function to generate a random number between 0 and 100. Finally, I’ll send the message and return true.
object HelloWorldCmd : CommandExecutor {
    override fun onCommand(sender: CommandSender, command: Command, label: String, args: Array<out String>): Boolean {
        if (sender !is Player) return false
        val name = sender.displayName
        val number = Random.nextInt(0, 100)
        sender.sendMessage("Hi, $name! Your number is $number ;)")
        return true
    }
}
The CommandExecutor interface is part of the Spigot API. When someone types a command, Spigot calls the onCommand function. The sender parameter tells us who sent the command (could be a player or the console), and we check if it’s a player using Kotlin’s smart casting with is.
A small detail I’ll add is coloring the message. You can use this color table as a reference and the ”§” symbol (CTRL + ALT + = on Windows) before the color code. In my case it looks like this:
sender.sendMessage("§aHi, §e$name§a! Your number is §e$number §a;)")Minecraft uses section symbols (§) followed by color codes to format text. §a is bright green, §e is yellow. It’s an old system from the early days of Minecraft that’s still used today.
Now to register this command, we should open plugin.yml and add it to the list. If you want, you can add permission, description, aliases and more within the command, but aiming for the simplicity of this guide, I’ll leave it empty.
commands:
  helloworld:
Now opening our main class, when activating the plugin in onEnable, we should define the command executor by passing the object we developed.
The onEnable method is called when Spigot loads your plugin. This is where you set up everything your plugin needs: register commands, load configuration files, set up databases, etc.
class Main : JavaPlugin() {
    override fun onEnable() {
        getCommand("helloworld")?.setExecutor(HelloWorldCmd)
    }
}
Done! At this point you’ve created a Spigot project, configured Kotlin, learned how to generate the JAR file, and used the Spigot API and Kotlin features to develop your first command. Take a look at how it looks when we take the compiled file and put it inside a server: